What is React Navigation?
React Navigation is a standalone library that enables you to implement navigation functionality in a React Native application.
It is written in javascript and does not directly use the native navigation APIs on iOS and Android. Rather it recreates some subset of those APIs.
Current Stable version of React Navigation is React Navigation 5.0, released in February 2020.
Installing React Navigation In Our App
You need to run the following command to add navigation to our app.
npm install @react-navigation/native
You can also install and configure dependencies used by most navigators. If you have an Expo the managed project, you can directly install those dependencies.
expo install react-native-gesture-handler react-native-reanimated react-native-screens react-native-safe-area-context @react-native-community/masked-view
This will install the versions of these libraries that are compatible.
If you are on Mac and developing for iOS, you need to install the pods(via Cocoapods) to complete the linking process.
npx pod-install ios
How to add Navigation to our Components?
First and foremost, You need to wrap the whole app in NavigationContainer. Usually, you'd do this
in your entry file, such as index.js or App.js:

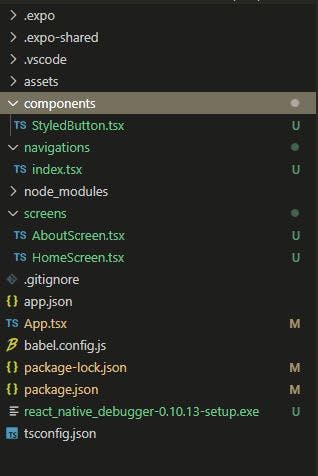
I have made a separate function Navigation in index.tsx inside my navigation folder and call it in our entry file.
import * as React from 'react';
import { NavigationContainer } from '@react-navigation/native';


function Navigation() {
  return (
    <NavigationContainer>
      // here you need to put codes of different navigators
    </NavigationContainer>
  )
}

export default Navigation;
I am calling the navigation component in our app.tsx file.
import React from 'react';
import Navigation from './navigations';

export default function App() {

  return (
      <Navigation />
  );
}
Different Navigators available in React Navigation
Usually, we have 3 main navigators. These are:-
StackNavigation
DrawerNavigation
TabNavigation
Others are combining among these navigators which we called nesting among different navigators such as stackNavigation inside of DrawerNavigation or TabNavigation etc.
To Apply any navigation we need to separately install those navigators to our app.
- StackNavigation: To add stack navigation in our app, we need to run this command
npm install @react-navigation/stack@react-navigation/stack depends on @react-native-community/masked-view so we need to install the later package in order to work stack navigation in our app which we have already installed previously.
Creating a stack navigator
createStackNavigator is a function that returns an object containing 2 properties. Screen and
Navigator. Both .of them are React components used for configuring the navigator. The Navigator
should contain Screen elements as its children to define the configuration for routes.
Here NavigationContainer is a component that manages our navigation tree and contains the navigation state.
import * as React from 'react';
import { createStackNavigator } from '@react-navigation/stack';
import AboutScreen from '../screens/AboutScreen';
import HomeScreen from '../screens/HomeScreen';

const Stack = createStackNavigator();

const RootStackNavigator = () => {
    return (
          <Stack.Navigator initialRouteName="Home">
               <Stack.Screen name="Home" component={HomeScreen} />
               <Stack.Screen name="About" component={AboutScreen} />
          </Stack.Navigator>
       )
}

export default RootStackNavigator;
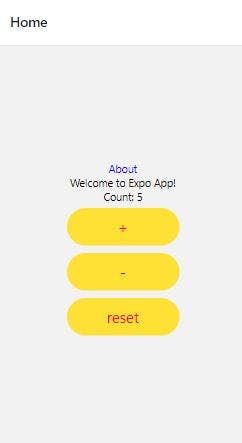
Here we are defining two routes Home and About and call the corresponding component.
HomeScreen Component -
import React from 'react'
import { StyleSheet, Text, View } from 'react-native'
import StyledButton from '../components/StyledButton';

const HomeScreen = ({navigation}: any) => {
    const [count, setCount] = React.useState(0);
    const handleIncrementClicked = () => {
        setCount(count + 1);
    }
    const handleDecrementClicked = () => {
        setCount(count - 1);
    }
    const handleResetClicked = () => {
        setCount(0);
    }
    return (
        <View style={styles.container}>
            <Text onPress={() => navigation.navigate('About')} style={{ color: 'blue'}}>About</Text>
            <Text>Count: {count}</Text>
            <StyledButton btnName="+" clicked={handleIncrementClicked} />
            <StyledButton btnName="-" clicked={handleDecrementClicked} />
            <StyledButton btnName="reset" clicked={handleResetClicked} />
        </View>
    )
}

export default HomeScreen

const styles = StyleSheet.create({
    container: {
        flex: 1,
        alignItems: 'center',
        justifyContent: 'center',
      },
})
StyledButton Component code -
import React from 'react'
import { View, Text, StyleSheet, TouchableOpacity } from 'react-native'

type StyledButtonProps = {
    btnName: string,
    clicked: () => void
}

const StyledButton = ({ btnName, clicked }: StyledButtonProps) => {
    return (
        <TouchableOpacity onPress={clicked}>
            <View style={styles.container}>
                <Text style={styles.containerText}>{btnName}</Text>
            </View>
        </TouchableOpacity>
    )
}

export default StyledButton

const styles = StyleSheet.create({
    container: {
        height: 50,
        width: 150,
        borderRadius: 50,
        backgroundColor: '#ffe135',
        display: 'flex',
        flexDirection: 'row',
        justifyContent: 'center',
        alignItems: 'center',
        margin: 5
    },

    containerText: {
        color: 'red',
        fontSize: 20,
    }
})
We have used StyledButton component in our previous article in Resusable component.
About Screen Component -
import React from 'react'
import { StyleSheet, Text, View } from 'react-native'

const AboutScreen = () => {
    return (
        <View style={styles.container}>
            <Text>About</Text>
        </View>
    )
}

export default AboutScreen;

const styles = StyleSheet.create({
    container: {
        flex: 1,
        alignItems: 'center',
        justifyContent: 'center',
      },
})
Finally using the stackNavigator in our index.tsx file inside Navigation function.
import * as React from 'react';
import { NavigationContainer } from '@react-navigation/native';
import RootStackNavigator from './RootStackNavigator';

function Navigation() {
  return (
    <NavigationContainer>
      <RootStackNavigator />
    </NavigationContainer>
  )
}

export default Navigation;


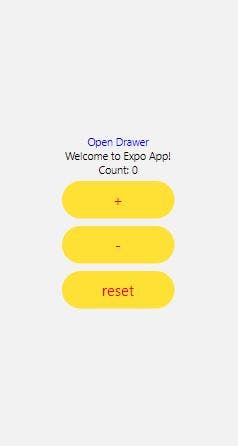
Similarly, We can use Drawer Navigation and Tab Navigation. We can install the corresponding navigator package.
For using Drawer Navigator, we will install the package with the following command.
npm install @react-navigation/drawer
To use this drawer navigator, import it from @react-navigation/drawer:
import * as React from 'react';
import { createDrawerNavigator } from '@react-navigation/drawer';
import AboutScreen from '../screens/AboutScreen';
import HomeScreen from '../screens/HomeScreen';

const Drawer = createDrawerNavigator();

function MyDrawer() {
  return (
    <Drawer.Navigator initialRouteName="Home">
      <Drawer.Screen name="Home" component={HomeScreen} />
      <Drawer.Screen name="About" component={AboutScreen} />
    </Drawer.Navigator>
  );
}

export default MyDrawer;
Again using the <MyDrawer /> tag in our index.tsx file inside Navigation function.
import * as React from 'react';
import { NavigationContainer } from '@react-navigation/native';
import MyDrawer from './MyDrawer';

function Navigation() {
  return (
    <NavigationContainer>
      <MyDrawer />
    </NavigationContainer>
  )
}

export default Navigation;


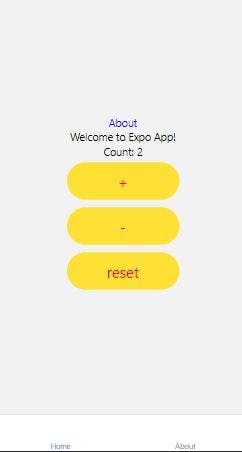
To use tab navigation in our app, we can install the following package.
npm install @react-navigation/bottom-tabs
To use this tab navigator, import it from @react-navigation/bottom-tabs:
import * as React from 'react';
import { createBottomTabNavigator } from '@react-navigation/bottom-tabs';
import AboutScreen from '../screens/AboutScreen';
import HomeScreen from '../screens/HomeScreen';

const Tab = createBottomTabNavigator();

function MyTabs() {
  return (
    <Tab.Navigator initialRouteName="Home">
      <Tab.Screen name="Home" component={HomeScreen} />
      <Tab.Screen name="About" component={AboutScreen} />
    </Tab.Navigator>
  );
}

export default MyTabs;
And for the third time, we update our index.tsx file with <MyTabs /> inside Navigation function.
import * as React from 'react';
import { NavigationContainer } from '@react-navigation/native';
import RootStackNavigator from './RootStackNavigator';

function Navigation() {
  return (
    <NavigationContainer>
      <MyTabs />
    </NavigationContainer>
  )
}

export default Navigation;

If you notice we have passed initialRouteName in each navigator to define the initial routes to display the screen.
Conclusion
I hope you learned how to add navigation to our app. We will continue this series with part 2 where we will explain nesting navigation and passing props between two screens.
Till then, Enjoy the Coding Journey!!
Please find the the above React Native Code in this link Blog App
Thanks for reading 😊
I would ❤ to connect with you at LinkedIn | GitHub
Share your queries in the comments section.
